Data export is a very useful and effective method to extract data from a table or entire database. We can extract all or a subset of data from any database. These extracted data can be used to load in other data sources or be treated as a backup of the table or database.
This article explains how to export MySQL database data in JSON files using mysqldump, MySQL Workbench, and dbForge Studio for MySQL.
For demonstration, I have installed MySQL 8.0 and MySQL Workbench on my workstation and installed two databases named sakila and world.
Export database using MySQL Workbench
In this example, you will understand how to export data in JSON format using MySQL Workbench.
Open MySQL Workbench and connect to MySQL database server. Click on Server > Open Schema navigator > Right-click on customer table > Select Table Data Export Wizard.
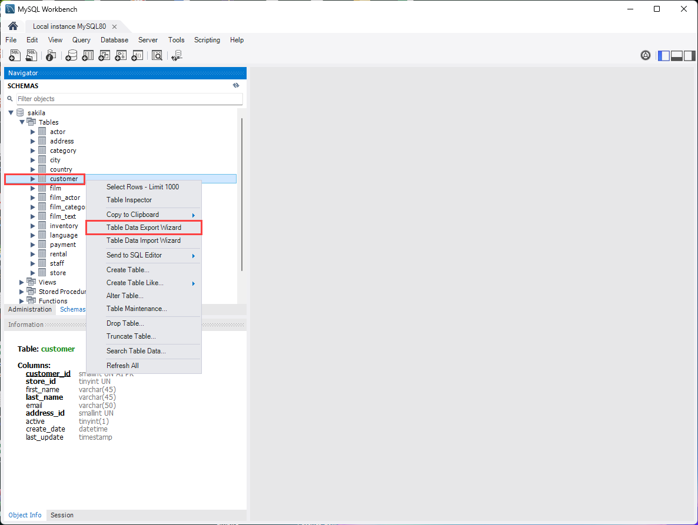
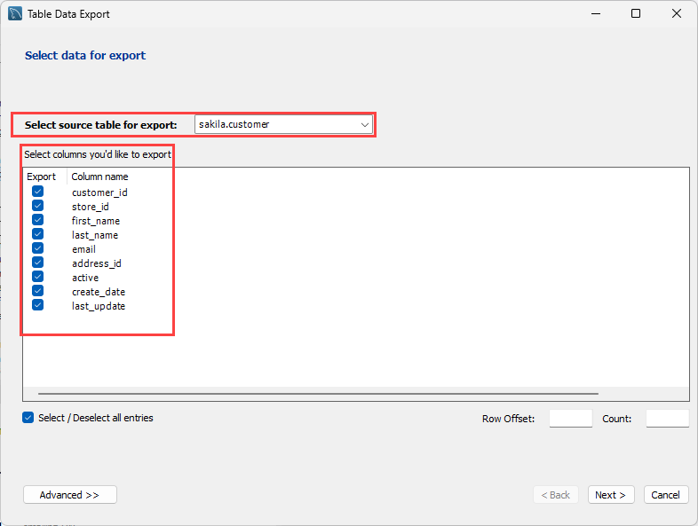
Table Data Export wizard starts. You can see the below options on the Select data for the export screen.
- Select source table for Export: The list of the tables created in the sakila database is loaded in the drop-down box. You can choose the table’s name that you want to export. We are exporting data from the customer table in this demo, so I have chosen the customer table.
- Select column to export: You can view the list of the selected table columns. If you want to export specific table columns, select them from the list. I am exporting all columns of the customer table.
Click Next.
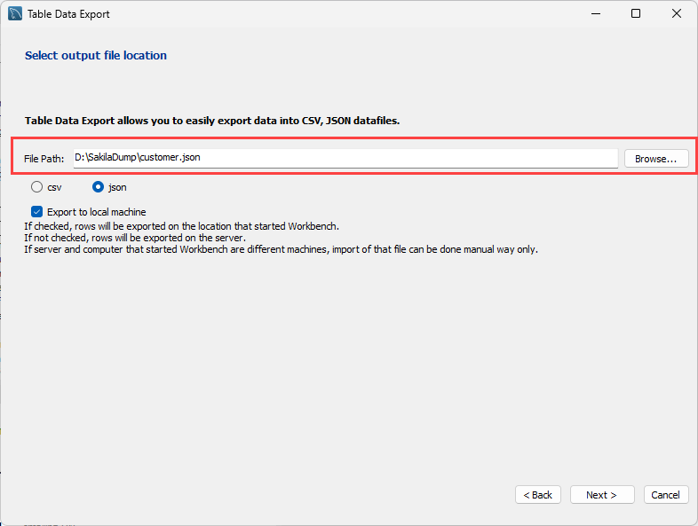
The next screen is Select output file location. Here you can enter the directory path where you want to save the exported JSON file. Note that the path includes the filename as well. In this demo, I am saving the file to the D:\SakilaDump location; the filename is customer.json. See the following screenshot. Click Next.
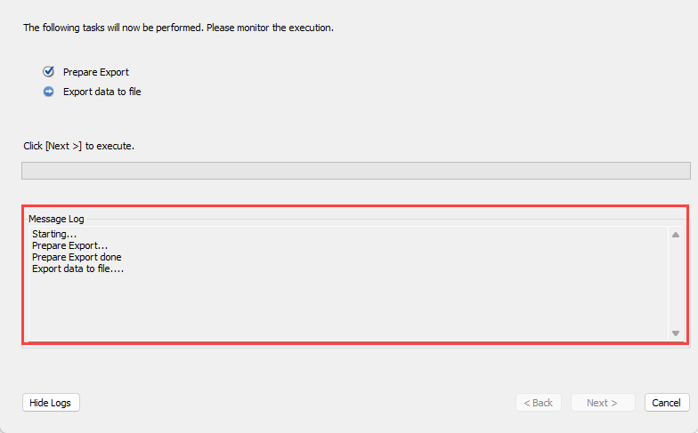
On the Export Data screen, you can monitor the data export process. You can view the progress in Message Log. Click Next to begin the data export process.
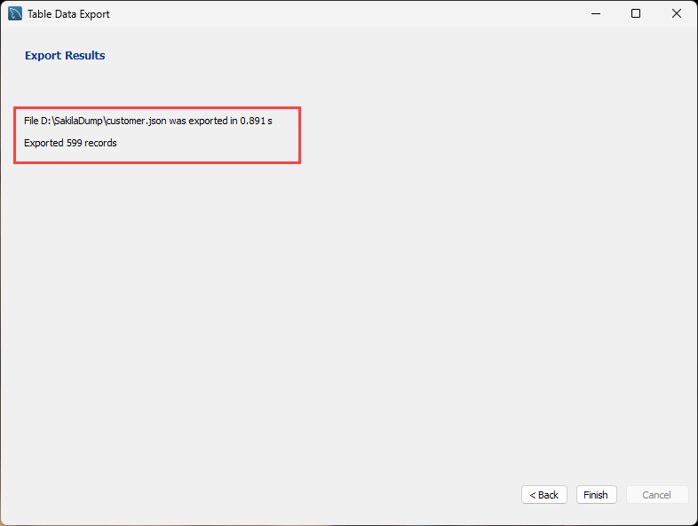
On the export result screen, you can view the number of exported records and the time taken to complete the export process. Click Finish to close the Table Data Export wizard.
Open the D:\SakilaDump\customer.json file to view the content of the JSON file.
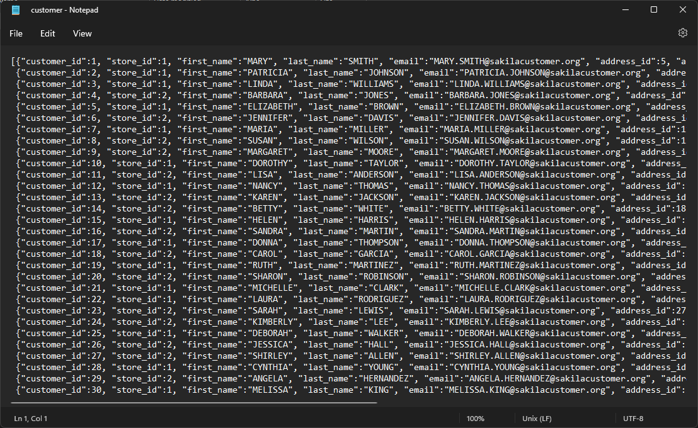
As you can see in the above image, the file is exported correctly.
Now, let us see how to export data to a JSON file using the mysqldump command.
Export database using MySQL command line
The mysqldump is a command line utility used to export MySQL server database data to various formats. The mysqldump does not support exporting data to JSON format. To do that, we will use a mysql command line interface.
First, let us transform the output of the SELECT query and wrap it in a JSON array. To do that, we are using JSON_ARRAYAGG and JSON_OBJECTAGG functions. We are exporting data from the City table, which is in the world database. The query populates the list of cities whose district is Gujarat.
The query is following:
SELECT JSON_ARRAYAGG(JSON_OBJECT('City Name', Name, 'Country Code', Countrycode, 'District', district, 'Population', Population)) FROM city c WHERE c.District='GUJARAT';Query output
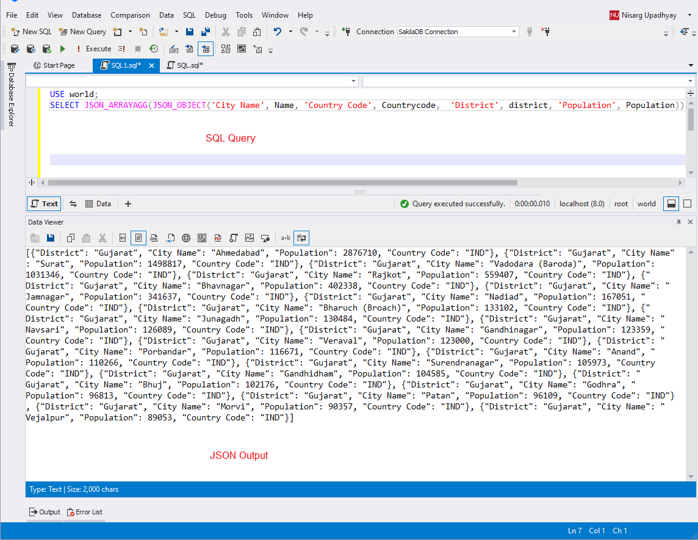
The above screenshot shows that the query has returned output in JSON format.
The next step is to save the SQL query output to a JSON file. To do that, execute the below query.
mysql -u root -p -s -e "use world; SELECT JSON_ARRAYAGG(JSON_OBJECT('City Name', Name, 'Country Code', Countrycode, 'District', district, 'Population', Population))as'' FROM city c WHERE c.District='GUJARAT';" > D:\World_DB\Gujarat_City.JSONOnce the command executes successfully, open the JSON file to verify the data.
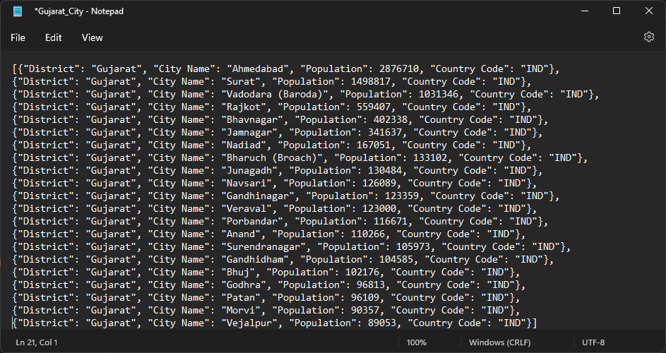
As you can see, the output is exported in the correct format.
Now, let us see how we can export data to JSON format using dbForge Studio for MySQL.
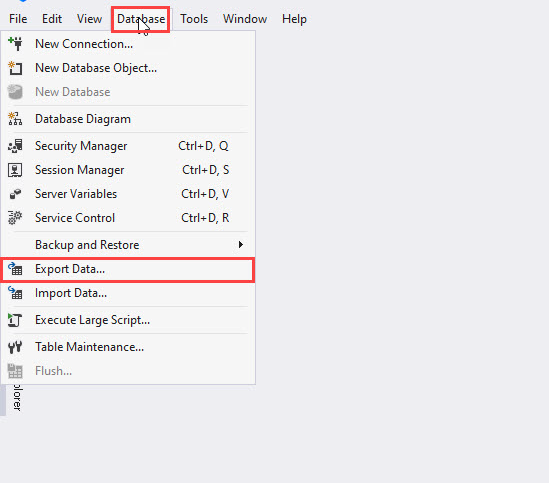
Export database using dbForge Studio for MySQL
In our previous examples, we learned how to export data to JSON format using MySQL workbench and MySQL command line interface. Both methods have limitations.
- When we use MySQL workbench, we can not export data of multiple tables to json format.
- When we use MySQL command line interface, we can export data from multiple tables, but to export data in json format, advanced scripting skills are required, and it is less convenient.
The dbForge Studio for MySQL is a sophisticated tool for managing the MySQL database server. It provides a feature that can be used to export the database. The dbForge studio for MySQL provides better flexibility in handling the database export process and is very easy to use. The dbForge studio can export the data of a table in the following formats.
- HTML, PDF: The data will be exported in a visually presentable format HTML (Web Pages) and PDF (Portable documents) formats that are used to show it.
- MS Excel, Google Sheets, and CSV: The data will be exported in editable workbooks. The exported data can be used to perform further analysis using PIVOT and other analytical functions.
- TEXT: The data will be exported in simple plain-text files.
- XML: The data will be exported in XML format.
- JSON: The data will be exported in a JSON file which can be used to store data in a NoSQL or other non-RDBMS databases.
- ODBC: This format can be used as an ODBC data source which can be used to export data from the MySQL database to another MySQL database or other RDBMS.
- MS Access: This export format will be used to export the database in the MS Access database.
- SQL: The data will be exported in a SQL file. The exported SQL file contains the table definition and SQL Queries to insert data in a database.
This demo will teach us how to export the MySQL database in a JSON file. We will export the sakila database in JSON format.
Launch dbForge Studio for MySQL > Connect to MySQL database > Select Database from the toolbar > Select Export Data.
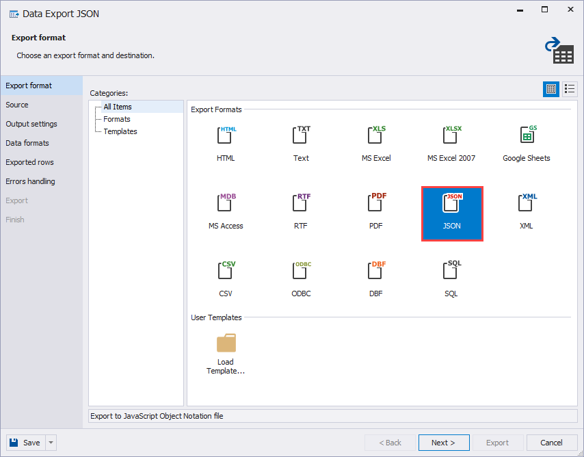
The database export wizard starts. Select the format you want to export the data on the Export Format screen. In this demo, we are exporting data in JSON format, so I selected JSON.
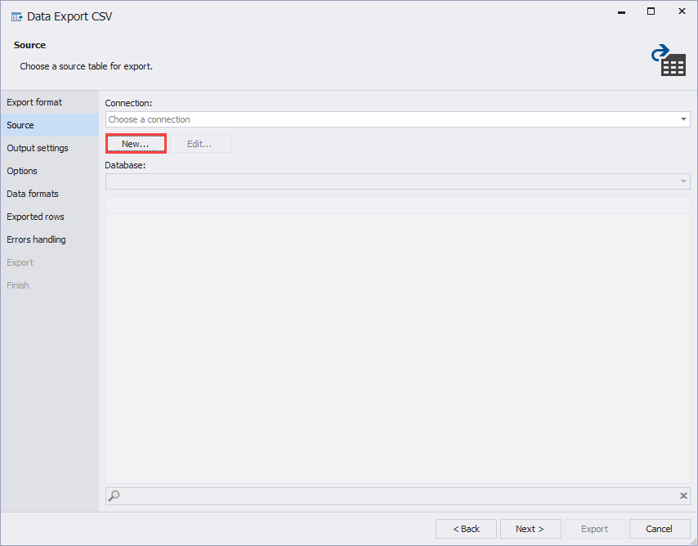
On the next screen, you must specify the source connection. To configure a new connection, Click on New.
A dialog box named Database Connection Properties opens. You can specify the following parameters used to connect to the MySQL database server.
- Type: Specify the type of connection. MySQL supports Named Pipe and TCP/IP connection types.
- Host: Specify the hostname on which MySQL is installed.
- Port: Specify the valid Port number on which the MySQL server accepts new connections.
- User: Specify the username.
- Password: Specify the valid password.
- Database: Select the database which you want to use.
- Connection Name: Specify the appropriate connection name.
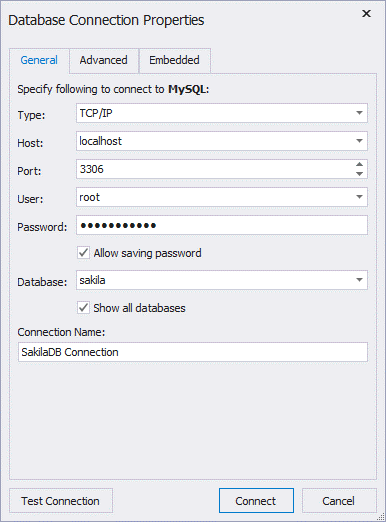
Click Connect to Save and connect to MySQL Server.
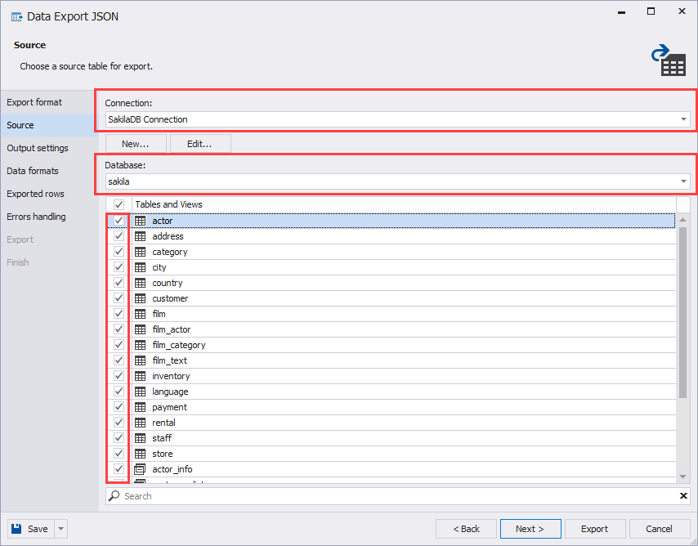
Back to the Source screen of the Data export wizard, you can see the list of tables and views are populated. You can select the tables and views that you want to export. We are exporting all tables in this demo, so I have selected all tables and views. Click Next.
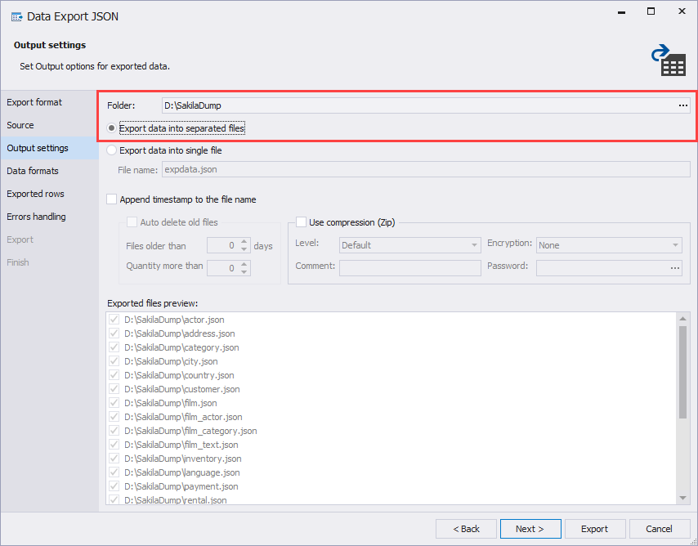
The next screen contains the Output options for the exported data. You can configure the following options
- Export Data into separate files: This option will export all data in the table in different files.
- Export Data into a single file: This option will export all data in one dump file.
- Append timestamp to the file name: This option will append a current time stamp with the dump file’s name.
- Auto Delete old file: This option will be enabled when you choose the “Append timestamp to the file name” option. Here you can specify the retention period of the dump file.
- Use Compression: You can compress the output dump files.
In this demo, I am selecting the default option. The output of the sakila database will be exported to the D:\SakilaDump location. Click Next.
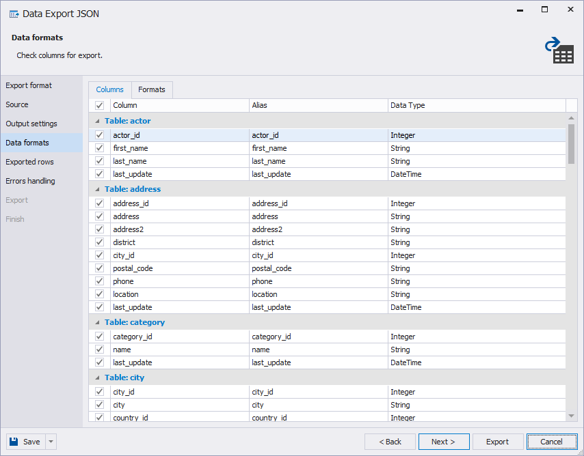
The next screen is used to select the list of columns of the tables that you want to export. You can see the list of columns with their alias and datatype. Here you can perform the following tasks:
- You can select all columns or specific columns to Export.
- Change the alias of the exported column.
- Change the data type of the exported column.
I am not making any changes. Click Next.
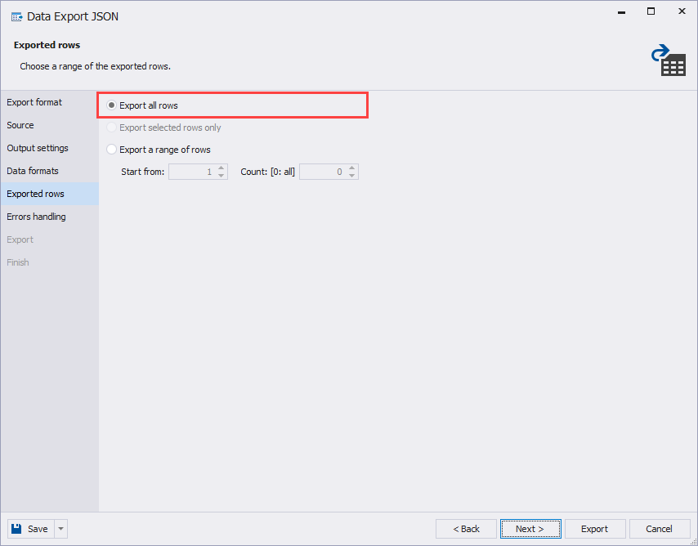
On the Exported Rows screen, you can select to export all rows of the tables or the range of the rows. I am exporting all rows of the tables, so I have selected the Export all rows option. Click Next.
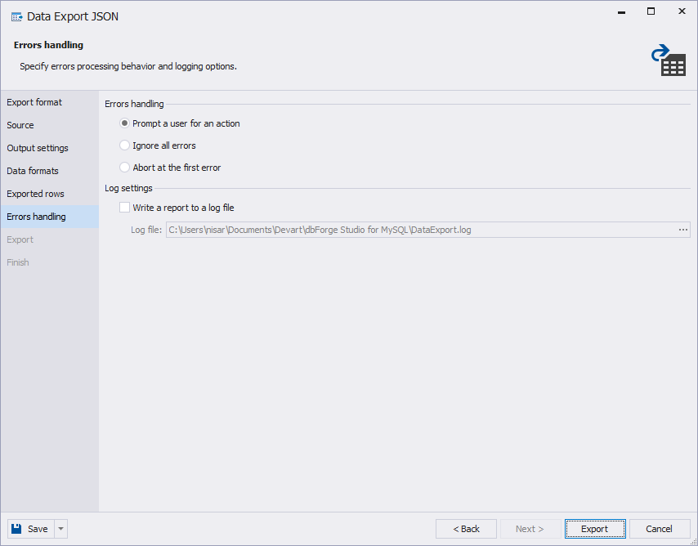
The next screen contains the options to manage the error handling. Here you can specify the location of the log file, which contains the details of the export process. Also, you can choose any of the following methods to handle the errors.
- Prompt a user for an action.
- Ignore all errors.
- Abore at the first error.
I have not made any changes. Click Export to begin the data export process.
The data export process begins.
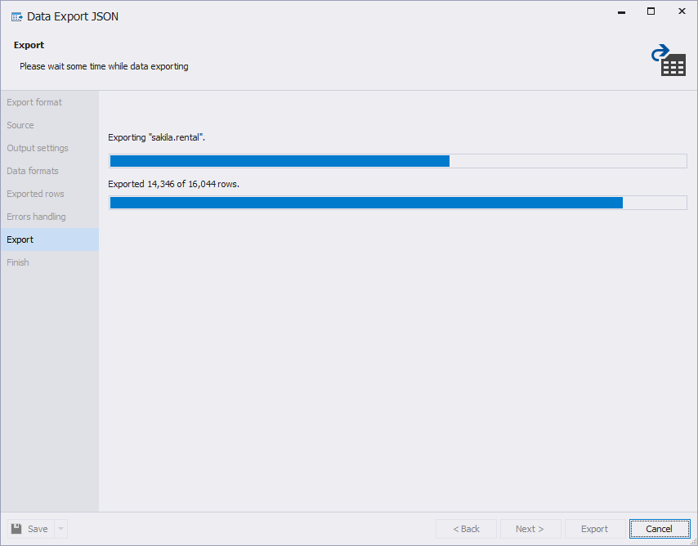
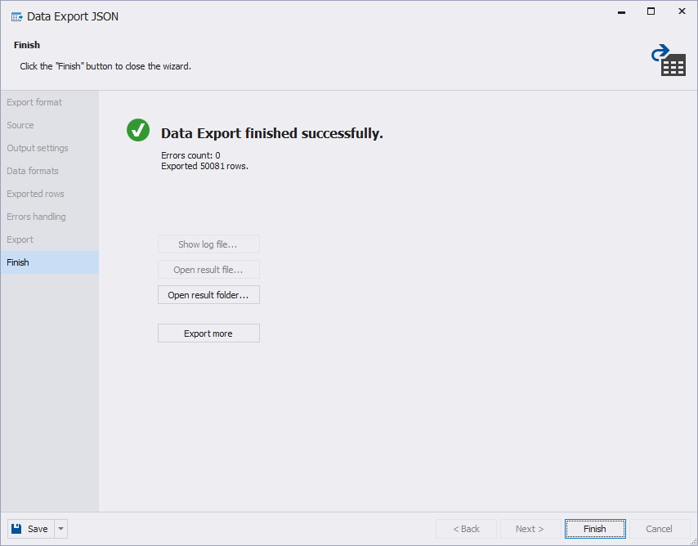
Once the export process completes, it shows the number of encountered errors and total exported records. Click Finish to close the Data Export wizard.
The exported dump file looks like the following images:
Image 1: Location of JSON files
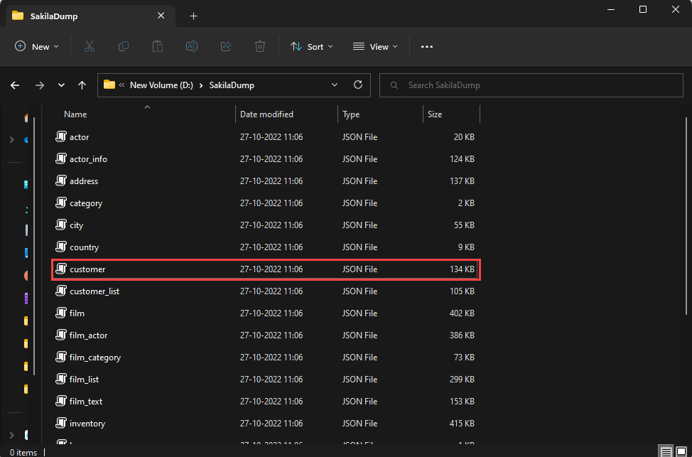
Image 2: Content of customer table in JSON file.
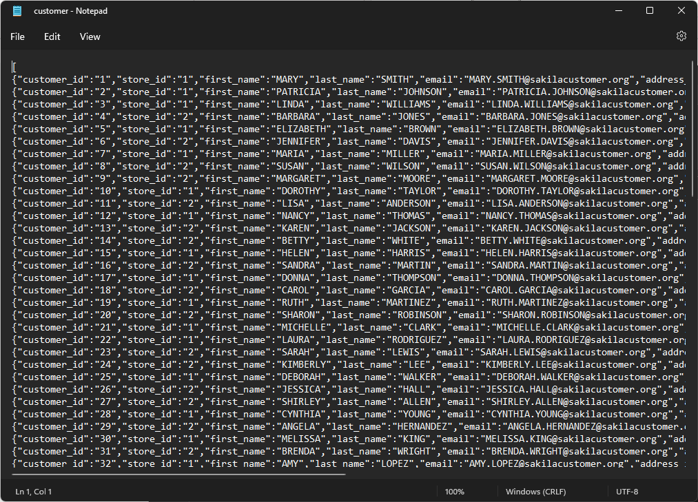
As you can see in above screenshot, the data has been exported in an appropriate format.
Summary
This article explains different methods to export data in JSON format. We learned following methods
- Export table data using MySQL workbench.
- Export table data using MySQL command line interface.
- Export table data using dbForge Studio for MySQL.